We have a tradition of giving each other a small, but personal gift to each other on Christmas Eve. My husband and I have done this since our first Christmas together, and when our son was born we included him in this by buying him new pyjamas to wear each Christmas Eve.
When I was younger I used to receive a little colouring book or family film for Christmas Eve to occupy those exciting hours before I tried to sleep through my excitement of Father Christmas visiting that night, and this is a little tradition I would like to pass on. As well as being a nice little jolt of memory and tradition for me, I also think it has some part in dispelling a little of that nervous excitement before Christmas Day. If those hours can be occupied with some colouring, or a wholesome film, then maybe it adds just a little to a more relaxed evening. I hope so, anyway.
My little boy has this year started to show a little of the interest in Christmas, talking of when Father Christmas might visit and a great interest in sending him a letter, so I thought as well as giving him his Christmas pyjamas this year I might also include a little sticker and activity book, or magazine of one of his favourite characters.
I usually wrap the Christmas pyjamas, but as the idea of Christmas Eve boxes has been a popular one these past few years, and I am trying to make my way towards a more sustainable and thoughtful season, I thought I would make a wooden box that can be reused every year and later used to store memories of our family Christmasses together.

I put this little box together in stages, first deciding on a design and layout for the top, then cutting the vinyl, lacquering the box, applying the vinyl, then re-laquering. As I already had the vinyl and lacquer, the only outlay I had was the £4 for the wooden box, which I bought from The Works (they also have a 2-pack for £7, which is even more bargainous if you wanted two!)
Of course, a design could be drawn, painted or stuck on in many, many forms. These boxes could be fabric-covered or embellished in all manner of ways. I chose vinyl because I thought the finish would be sturdy and long-lasting. And I already had some.

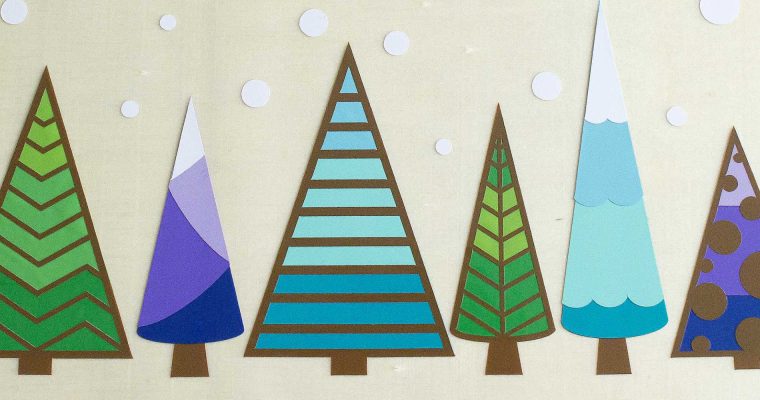
I had seen a wooden box that I quite liked, that was left neutral, with a picture of Christmas trees on the front, so took that as inspiration. I was going to draw each of the trees, and did indeed make a whole selection of them for use on a Christmas card, but decided on a style change at the last moment and used two sets of trees from Miss Kate Cuttables: Christmas Trees and Retro Trees.
I layered the images of trees up to work with a limited palette of colours that I had chosen, and added text and a few circles for snow, before cutting my vinyl pieces and stacking the colours in layers to make the multicoloured trees.
I used Beetle for the script font, and Canter, a particular favourite of mine, for the rest of the text.
Once the vinyl pieces were all stacked and arranged on a piece of transfer tape to apply in one piece to the box, I gave the box a couple of light coats of a clear acrylic lacquer spray to prime the surface and give a slicker, less absorbent surface for the vinyl to adhere to. The vinyl transferred like an absolute dream, all in one single motion. The lacquer spray made a massive difference.
Once the vinyl was applied I gave the entire box, including the vinyl, one more spray coat with the lacquer spray, and this quick and easy, but personalised Christmas Eve box was complete.
