It’d been a long while since I made a shirt, maybe almost a decade, but certainly since before Bean was born, and I thought it was about time I introduced a few more wovens to his wardrobe for the summer.
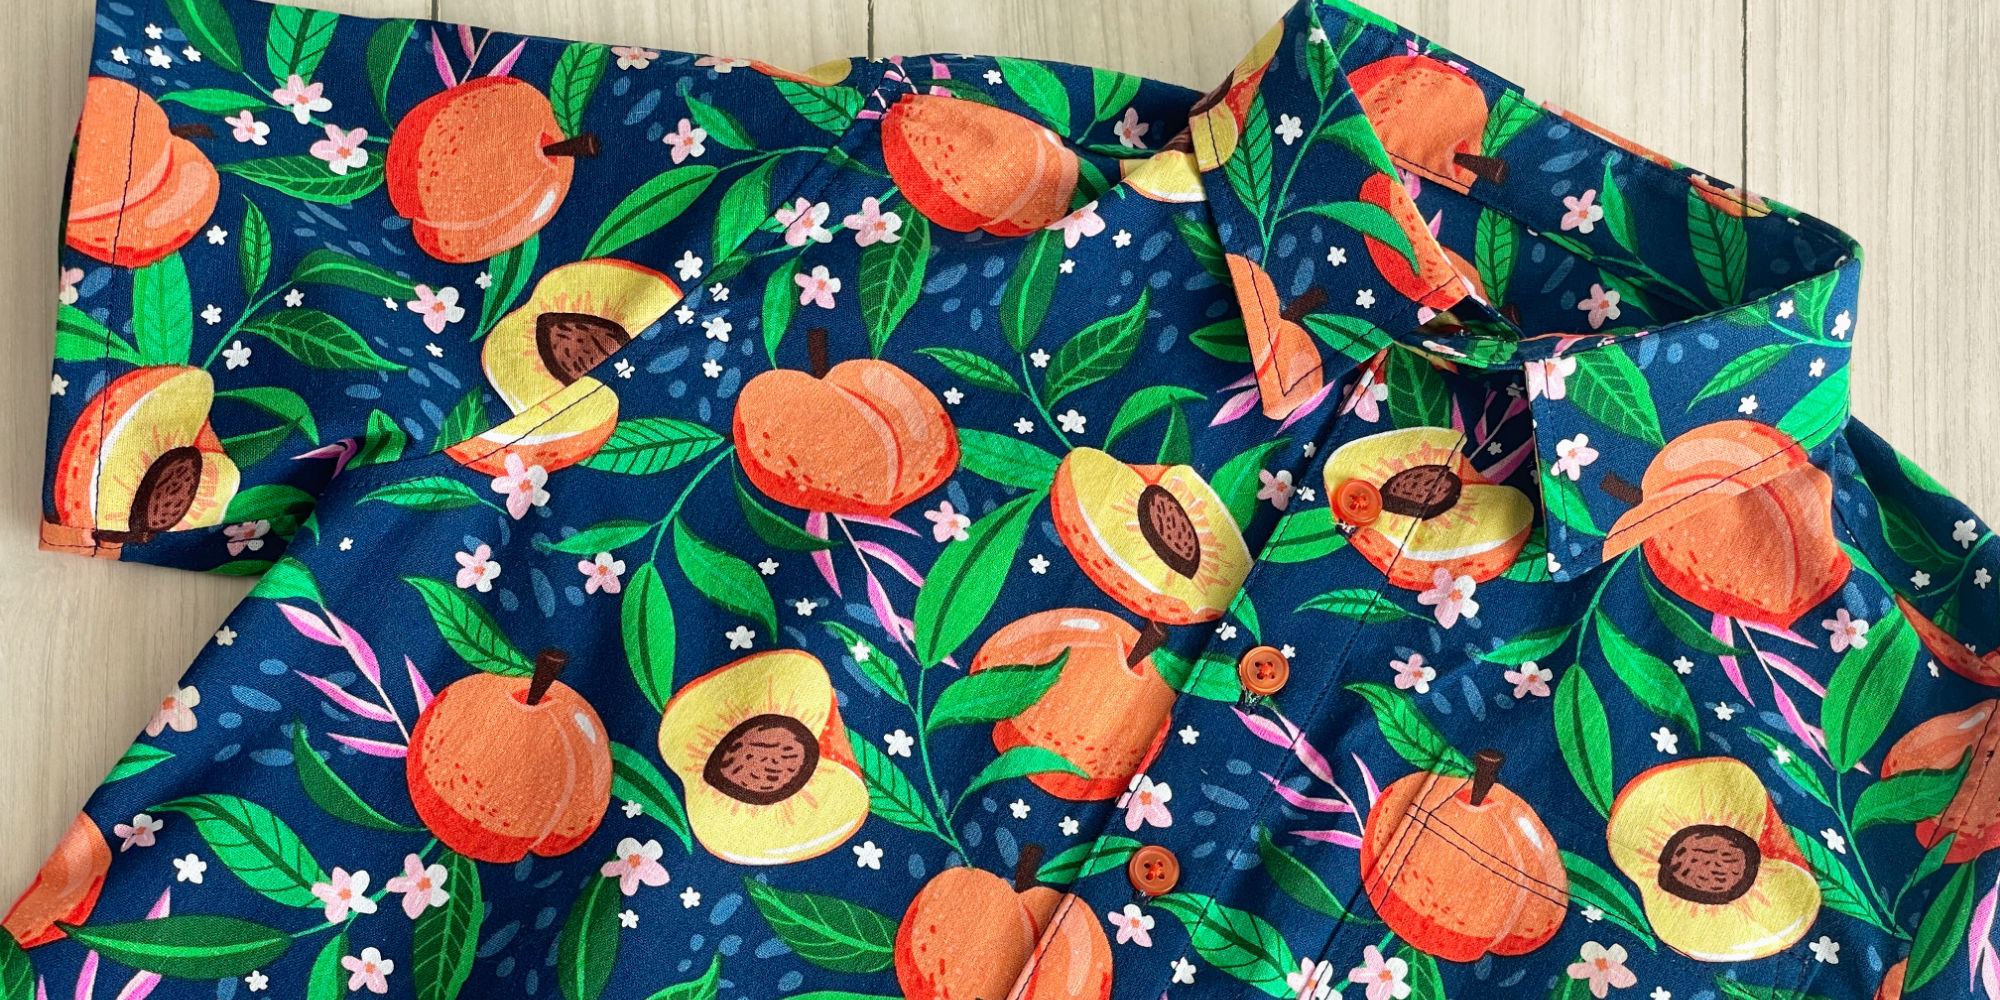
I wanted to make a traditional shirt, but very relaxed and with short sleeves to make the most of the summer months ahead. After an internet browse-around I found the most wonderful fabric and knew immediately that the tropical peaches print would make a fantastic aloha style shirt.

I used the Sunset Shirt pattern that I had bought a year or two previously but never actually got around to cut and make. It is a traditional shirt pattern with collar stand, collar, optional cuff and button packet sleeves (though I went with a simple short sleeve) 0-2 pocket options (I opted for a single pocket), curved hem and separate button bands on both button and buttonhole sides.
Pattern Matching, Shirt Style
Because I had chosen such a graphic print for the shirt I had to make a firm decision on whether to pattern match the print. Either I had to try and get it spot on or just disregard it altogether, because I slightly off pattern match looks worse than none at all. Where there are repeated sections of the print sewn very close together it can look like a visual glitch.
I decided that as I was going to have to pay close attention to the pattern repeat either way I might as well try to match the pieces.

I usually start by matching the side seams of the two fronts to the side seam of the back yoke and main back piece. The pleats in the back need to be accounted for, so I fold along the pleats to give me the finished back width, and then match the side seams of the shirt front pieces to it. By laying the shirt front pattern pieces on the back pieces and matching the sides and shoulders I can see where the pattern should fall on both shirt fronts.
As this pattern has separate button bands that are later attached for both the buttonholes and the buttons, these also needed to be pattern matched, as did the pocket.

The back of the shirt is not pattern matched, for a couple of reasons. Firstly the pleats in the back shirt piece mean that it is a different width to the yoke, and though as they are set to the sides it would mean I could have matched the central portion of fabric, it would again have looked strange at the point at which the pleats disturbed the match. Secondly, I had to decide whether to cut the back yoke of the shirt diagonally, or to cut it with a vertical grain. Though the fabric is directional, as the peaches themselves sit at various angles, cutting the yoke diagonally looked fine and gives a little bit of movement in the shoulder area.

Make Again Changes
I will quite likely make this shirt again at some point, but if I did so I would likely make couple of changes. I’d probably keep the back pleat but make a more traditional centred double pleat. I think I’d also integrate at least the button band but maybe also the buttonhole band into the front shirt pieces, both to reduce bulk and to help it fall more relaxed when open, but also to help make pattern matching easier.