Back in March of this year I made a couple of toddler art smocks for two awesome little guys in my life: my little boy and his best friend. My little guy’s art smock gets used at least a couple of times each week as we are still enjoying creating works of messy art at home. It has washed really well, and despite being covered with paint all of the time, after a trip through the washing machine it looks like the day I made it.
A few days ago I saw that another important little person that I know and love had taken his first forays into doing some painting at home, and he and his proud mummy were making some amazing pieces of art. I don’t know if he had an art smock, but he wasn’t wearing one, and any excuse for a trip to the fabric store, right? I planned to make two smocks, one for the little artist and another for his cousin, both of whom are Darwin’s first cousins once remumblemumble…something.
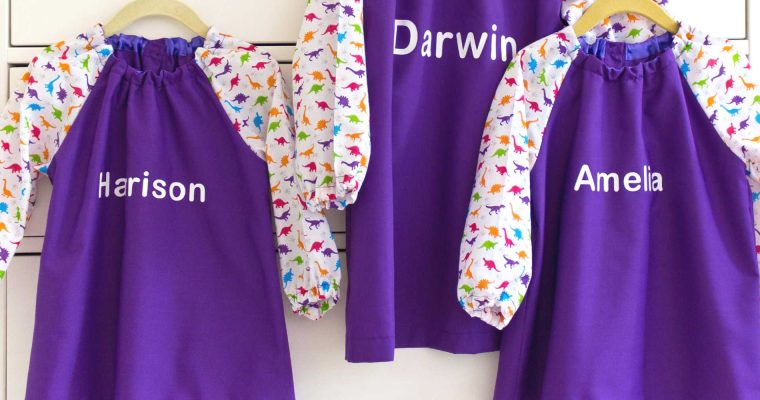
I emerged from my local fabric store with two metres of a purple polycotton, plus a metre of dinosaur print polycotton for the sleeves, just because I loved it so much.
When I got home I was struck by the sudden necessity to fit not just the pieces for the two 1-3 year sized smocks out of the fabric, but a third, larger, size 3-5 year smock, for my little boy. The summer holidays fast approach, which will mean seven weeks of home art happenings, and a second smock will likely be much required.
The print on the dinosaur fabric ran in a single direction, and though there was no room for error, the placement of the six sleeve pieces was relatively simple. I had to get a bit more creative with the placement of the pieces for the three fronts and six back pieces for the main smock pieces to be cut from the purple fabric pieces, however. Luckily, my wasted youth and proficiency at Tetris has not gone to waste, and I just about squeezed the placement of the pattern pieces onto the fabric.
Sewing the smocks is relatively simple, and I again followed the suggested instructions in the book to make the smocks with french seams throughout.

The first time I sewed a couple of these smocks I wondered if this wasn’t just a bit too fussy, considering the function of the smocks as protective painting wear rather than a garment, but I’ve since changed my mind on this. After all, seams are sewn twice for a normal zig-zag finishing treatment, so it’s no extra work, apart from manoeuvring the fabric to the wrong side for the final seam line, and it really is a nice finish.
I cheated with the strip of bias fabric required for the neckline casing, and used some satin bias tape, both for speed and because it was cheaper than buying the additional fabric that I’d have needed to get a decent area to cut the bias strip from.
Once the sewing was completed (I worked on the smocks production line smile over a couple of days), I decided to embellish them each with a name, because now that I can vinyl transfer, I will vinyl transfer. I used a simple Arial Rounded font as it reminds me of the nursery font that surrounded my childhood on all the school learning materials of the classroom.

I’m hoping that in the current heat wave this lighter weight smock will be more comfortable and allow more freedom of movement than the heavy canvas smock I made earlier in the year, as we embark on seven weeks of painting, baking, and all kinds of making together, and I hope the smocks that make their way to other family members serve well in all kind of cooking, gardening or art adventures, or even just as a big bib. I think next time I may even make one for myself.
